YubiRadius_integration_with_group-validated_FreeIPA_Users_using_LDAPS#
YubiRadius integration with group-validated FreeIPA Users using LDAPS
Provided by Dale Macartney
This page is a copy of the original post that can be found here. ` <https://www.dalemacartney.com/2012/07/13/yubiradius-integration-with-group-validated-freeipa-users-using-ldaps/>`__https://www.dalemacartney.com/2012/07/13/yubiradius-integration-with-group-validated-freeipa-users-using-ldaps/
This article will show you how to set up the YubiRadius Virtual Appliance (v. 3.5.1) for User validation against a FreeIPA infrastructure on Red Hat Enterprise Linux 6.3.
You can obtain the YubiRadius Virtual Appliance from the good people over at Yubico, or just click here
This guide is not meant to show you how to configure a virtual appliance in your choice of Virtualization technology, although as I am using KVM, a special thanks to Gavin Spurgeon for getting this VA converted and working smoothly (even with virtio for the icing on the cake).
For details in configuring the Virtual Appliance you can reference the Yubico’s provided documentation here if you wish.
Now, before we begin, the details for the purpose of this article are as follows.
IPA server: ds01.example.com (10.0.1.11)
YubiRadius VA: yubiradius01.example.com (10.0.1.31)
Group to be used for validation: "yubikey"
YubiRadius LDAP Bind Account: "yubiradius"
Example Users: euser1, euser2, euser3, euser4, euser5
Step 1. Create our Group to be used for user validation#
On your FreeIPA server, run the following:
[root@ds01 ~]# ipa group-add
Group name: yubikey
Description: YubiKey validation group
---------------------
Added group "yubikey"
---------------------
Group name: yubikey
Description: YubiKey validation group
GID: 1870200005
[root@ds01 ~]#
Step 2. Add users to your new group.#
As I have already created my users, I will add them to the group I have just created.
[root@ds01 ~]# ipa group-add-member yubikey
[member user]: euser1,euser2,euser3,euser4,euser5
[member group]:
Group name: yubikey
Description: YubiKey validation group
GID: 1870200005
Member users: euser1, euser2, euser3, euser4, euser5
-------------------------
Number of members added 5
-------------------------
[root@ds01 ~]#
Step 3, Create an LDAP bind account.#
Create a text file called “yubiradius.ldif” with the following content.
Be sure to change the password to something secure. In this example I have used “redhat123”
dn: uid=yubiradius,cn=sysaccounts,cn=etc,dc=example,dc=com
changetype: add
objectclass: account
objectclass: simplesecurityobject
uid: yubiradius
userPassword: redhat123
passwordExpirationTime: 20380119031407Z
nsIdleTimeout: 0
Now, import yubiradius.ldif into FreeIPA. You will need to enter your Directory Manager password, as you are making additions to LDAP.
[root@ds01 ~]# ldapmodify -h ds01.example.com -p 389 -x -D "cn=Directory  Manager" -W -f yubiradius.ldif
Enter LDAP Password:
adding new entry "uid=yubiradius,cn=sysaccounts,cn=etc,dc=example,dc=com"
[root@ds01 ~]#
Step 4. Add your YubiRadius server’s hostname to our DNS environment. If you are using IPA to manage your DNS, do the following.#
[root@ds01 ~]# ipa dnsrecord-add example.com yubiradius01 --a-rec 10.0.1.31
Record name: yubiradius01
A record: 10.0.1.31
[root@ds01 ~]# ipa dnsrecord-add 1.0.10.in-addr.arpa. 31 --ptr-rec   yubiradius01.example.com.
Record name: 31
PTR record: yubiradius01.example.com.
[root@ds01 ~]#
Step 5. Start to configure your YubiRadius through the webmin management page.#
Start by logging into your Yubiradius.
Browse to https://:10000
Log in with these details
Username: yubikey
Password: yubico
See attached screen shot
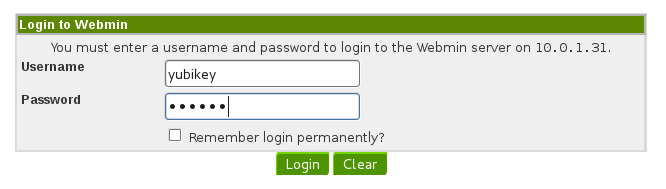
Webmin_Login.png#
Step 6. Create a domain.#
The first page you will be presented with, will be the Domain page, before continuing, enter your domain name and click the “Add Domain” button.
In my example, it is “example.com”
Step 7. Import Users from FreeIPA#
Once you have created your domain, it will appear in the Domains list. Click your domain to enter the configuration.
You will see there is currently no users configured. Click on the “Users Import” tab to continue.
Use the following details to configure your User Import. You will notice I am using Secure LDAP lookups. This stops the usernames and passwords from being transmitted in clear text. I HIGHLY recommend you do the same.
Use Secure Connection? = Yes
LDAP/AD Server Address or Host Name = ds01.example.com
Backup LDAP/AD Server Address or Host Name = (leave blank)
Port (use 0 or blank to use the default port) = 636
Directory Type = OpenLDAP
LDAP Version = 3
Base DN = cn=users,cn=accounts,dc=example,dc=com
User DN = uid=yubiradius,cn=sysaccounts,cn=etc,dc=example,dc=com
Password = redhat123
Schedule = Hourly
Timeout (Seconds) = 0
Filter = (memberOf=cn=yubikey,cn=groups,cn=accounts,dc=example,dc=com)
Notes = Blank
Login Name Identifier = uid
Once you have filled in all the relevant details. Click the “save” button. Once you have saved your configuration. Click the “Import Users” button.
You will be presented with a window that should look as follows. If you receive an error, you may have made an error in your configuration in this step. You will want to go back to double check.
See attached screen shot
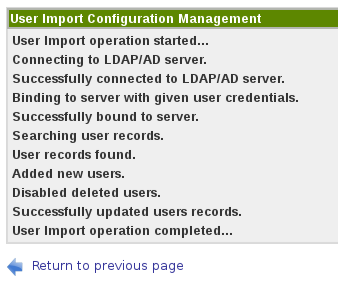
UserImportSuccessful.png#
Once this has completed, click “Return to previous page”, and then click the “Users/Groups” tab at the top.
Step 8. Assign Yubikey(s) to your User(s)#
You should now see a list of users. These users will be a member of the “Yubikey” group. Note that there are no others users in the list.
To assign a Yubikey, you will need.. you guessed it, a Yubikey. Click the “Assign Yubikey” button
You will need to provide the username of one of your Users. For example, I have used “euser1”
You will also need to provide an OTP from the Yubikey you wish to assign. Insert the Yubikey into a USB socket, and press the Golden button once the light comes on. (Press for 1 second).
Pressing the Yubikey will also issue the “Enter” key command. So it should complete the process itself. If for some reason it does not, click the “Create” button.
Now lets go back to our Users/Group list. Click “YubiRADIUS Virtual Appliance” on the left side panel, and then click on your domain.
Your Users/Group list will now show you have assigned One Yubikey
See attached screen shot
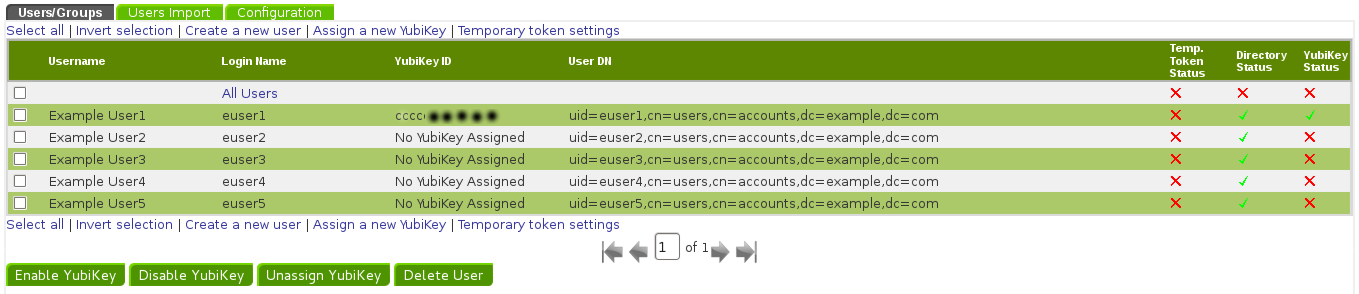
UserList.png#
Step 9. Verify your User’s Radius authentication.#
Click “YubiRADIUS Virtual Appliance” on the left side panel once more, then click the “Troubleshoot” tab.
In the “RadTest” section, enter the username, password and OTP (another 1 second press of the yubikey” and click the “Send Request” button.
This should successfully validate your radius, your OTP with the YubiCloud service hosted by Yubico, as well as your username and password credentials.
See attached screen shot
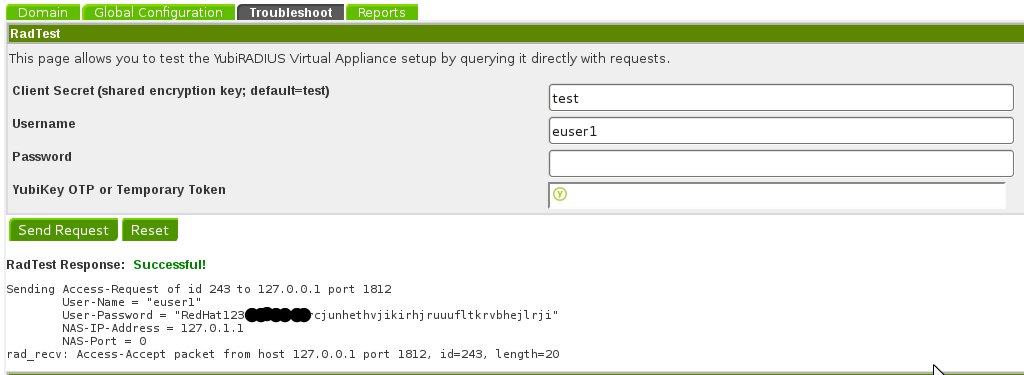
RedTest.png#
You can see here that the user’s password and OTP are joined together. The Example User1’s password is RedHat123, and the OTP consists of the KeyID + a OTP.
That’s it folks. You can now use the YubiRadius to authenticate normal Radius requests with your Yubikey as Two Factor Authentication