Setting_up_Active_Directory_domain_for_testing_purposes#
Setting up Active Directory domain for testing purposes#
Microsoft offers pre-installed Windows Server 2008 R2 Enterprise Edition x64 for evaluation purposes.
You can download these virtual machine images in VHD format, convert them to QCOW2 format suitable for KVM and run original VMs under Linux.
Commands in following text are shown with typewriter font.
Before you start#
You will need:
at least 16 GB of free space in filesystem (/tmp/vhd is used as example)
unar or unrar utility
unar is available on Fedora 20 and later
If you cannot find unar:
unrar is not a part of standard Fedora distribution, you needed to install it from RPM Fusion
sudo yum localinstall -y`http://download1.rpmfusion.org/nonfree/fedora/rpmfusion-nonfree-release-stable.noarch.rpm<http://download1.rpmfusion.org/nonfree/fedora/rpmfusion-nonfree-release-stable.noarch.rpm>`__sudo yum install -y unrar
qemu-img utility
sudo yum install -y qemu-img
KVM, libvirt, QEMU and Virtual Machine Manager
sudo yum install -y kvm libvirt qemu virt-manager
Download and unpack original images#
For reference and manual download you can see original Microsoft’s page with detailed information.
For fast download run the following commands in terminal: ‘’’
mkdir -p /tmp/vhd
cd /tmp/vhd
wget http://download.microsoft.com/download/5/4/C/54C15FA1-B3AA-4A8B-B26C-47C3BA7A20E0/WS2008R2Fullx64Ent.part01.exe
wget http://download.microsoft.com/download/5/4/C/54C15FA1-B3AA-4A8B-B26C-47C3BA7A20E0/WS2008R2Fullx64Ent.part02.rar
wget http://download.microsoft.com/download/5/4/C/54C15FA1-B3AA-4A8B-B26C-47C3BA7A20E0/WS2008R2Fullx64Ent.part03.rar
unar WS2008R2Fullx64Ent.part01.exe
# OR if unar is not available
unrar x WS2008R2Fullx64Ent.part01.exe
‘’’
Convert original VHD image for KVM#
‘’’
cd "/tmp/vhd/WS2008R2Fullx64Ent/WS2008R2Fullx64Ent/Virtual Hard Disks"
qemu-img convert -p -f vpc -O qcow2 WS2008R2Fullx64Ent.vhd WS2008R2Fullx64Ent.qcow2
‘’’
Conversion can take approximately up to 20 minutes. Progress indicator will show < 10 % for a long time and then it finishes.
Output file (WS2008R2Fullx64Ent.qcow2) should have approximately same size as original file (WS2008R2Fullx64Ent.vhd).
Define a new virtual machine for AD domain controller#
Run virtual machine manager:
sudo virt-managerClick on “create a new virtual machine” icon
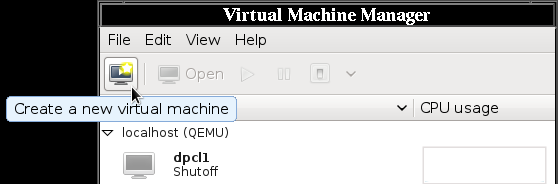
Virtman-add-mach1.png#
Enter arbitraty machine id (it is internal to KVM/libvirt) and select “Import existing disk image” option
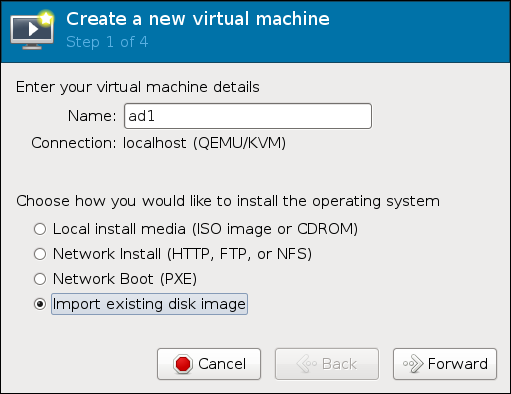
Virtman-add-mach2.png#
Enter path to the disk image:
/tmp/vhd/WS2008R2Fullx64Ent/WS2008R2Fullx64Ent/Virtual Hard Disks/WS2008R2Fullx64Ent.qcow2Set “OS type” to “Windows” and “Version” to “Microsoft Windows Server 2008”

Virtman-add-mach5.png#
In next dialog check “Customize configuration before install”
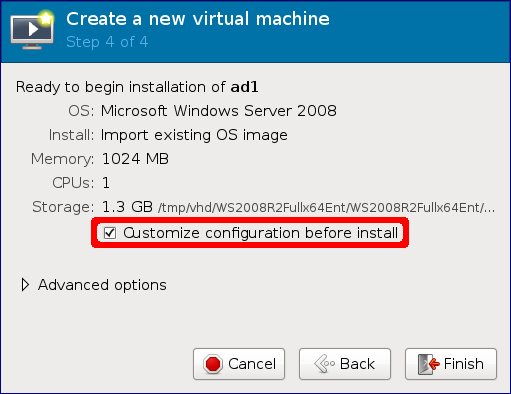
Virtman-add-mach6-highlight.png#
In the list on left side select “Disk 1” and under “Advanced options” change “Storage format” to “qcow2”
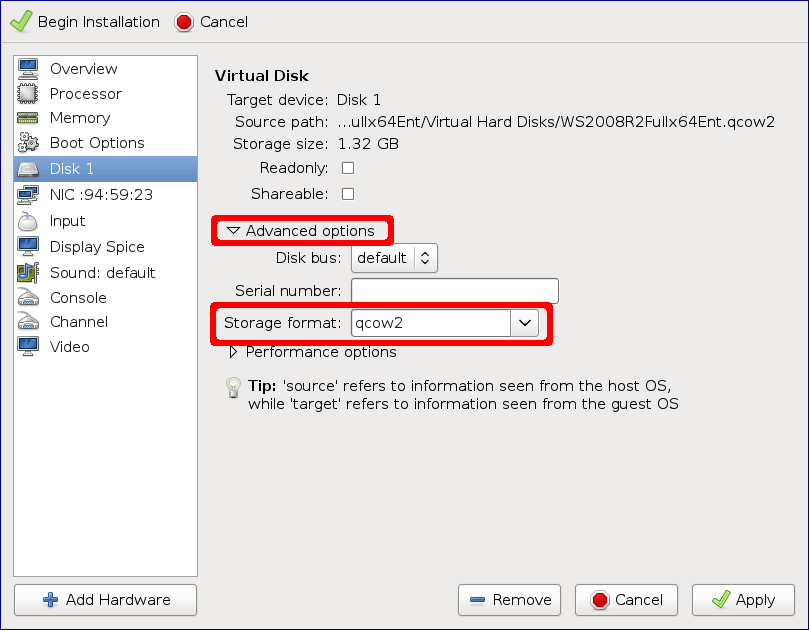
Virtman-add-mach7-highlight.png#
(optional) If you want to connect to AD from physical network, then select appropriate (physical) “Source device” under “NIC”
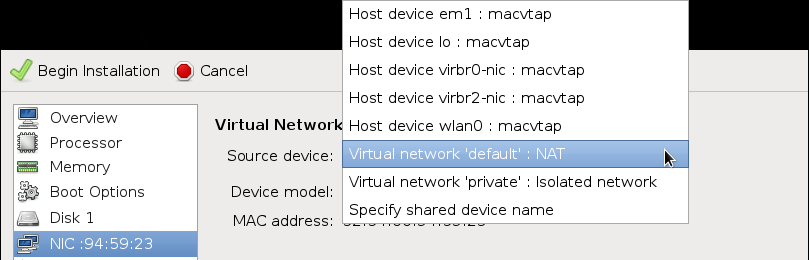
Virtman-add-mach8-cut.png#
Click on “Begin Installation” button

Virtman-add-mach9-cut.png#
The new VM will be started automatically.
The first start#
Be patient. Windows will start after few minutes. You has to go through Next-Next-Finish wizard with language and license.
After the licence wizard you will be forced to change password for “Administrator”. It has to contain at least 6 characters from at least three character classes. Password “ADMIN4lab” should work. Important note: Passwords for computer Administrator and Active Directory administrator are not same.
Creating a new Active Directory domain#
Stef Walter’s blog post How to create an Active Directory domain to test against contains detailed instructions. Please follow it from step 5 further.